My Blog List

Showing posts with label bpm. Show all posts

Saturday, May 28, 2022

New Features of Appian 22.2 Product Release


Hello, everyone! I hope you all are doing well and safe. As you all know that I come up with new things, so today I am gonna tell you about the new release of Appian.

You know that Appian released its new version quarterly, so this May Appian released the new version of Appian is a 22.2 product release! Congratulations!, and today we are gonna learn what are the new features added in this release.

There are many new features added in this release but we are going to learn the few ones but most important which is helpful for the newbies.

Appian 22.2 product release includes exciting enhancements to automation, our development experience, and more.

There are the following topics are updated with new features.
  • Process scorecards for more insights
  • Sync any changed data
  • Appian Designer transformed
  • Records
  • SAIL
  • Expression rules
  • Components
  • New functions and many more updates and features are added.

Appian Designer Transformed:


First, let me tell you all, that there is a new Appian Designer coming to you all, and I am damn sure you will love it! Your new Appian Designer dashboard will look alike as below.


Now you can see the new dashboard as above, it is completely changed and I really like it. I am waiting for this because it enhanced the applications list and much more.

SAIL:


Appian SAIL stands for Self-Assembly Interface Layer is a technology that plays an important role as an object in the Appian. I am not going to talk much about SAIL, please refer to this link for SAIL Technology to learn more.

There are the following features are added and updated in this new release.
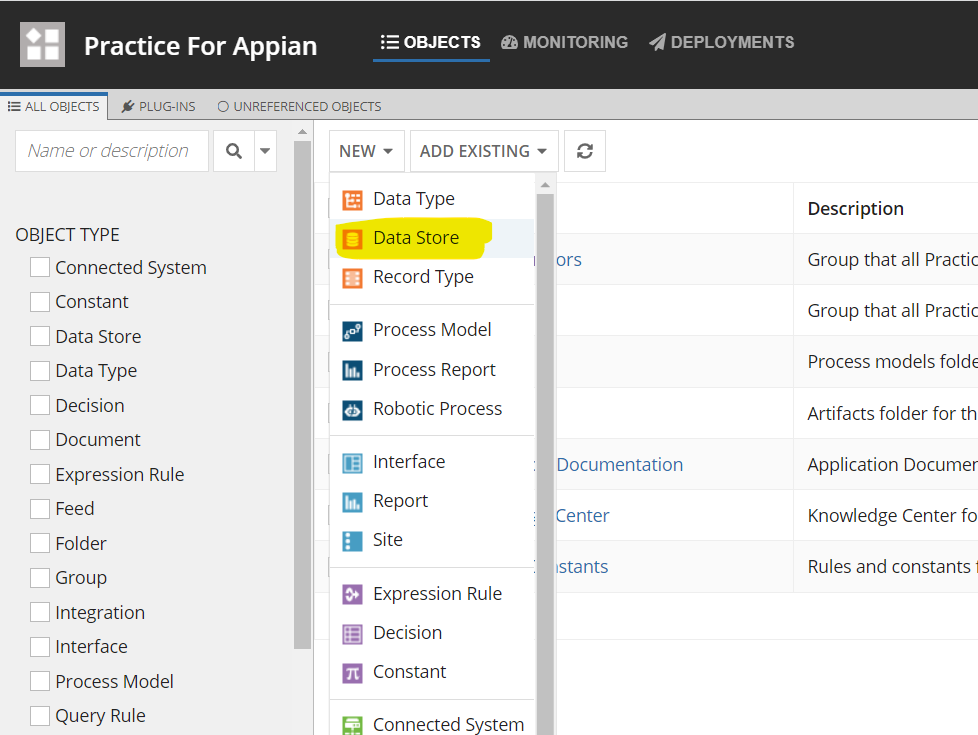
  • Now designers can create new interfaces from the Sites


  • a!queryLogicalExpression can now use multiple filters
  • File uploads are now 25% faster
  • Portals are available in the community edition
  • Syncing data from the database or salesforce is now up to 2X
  • Generating Web API to sync records
  • The new data sync smart service, allows designers to initiate a data sync for any record types
  • Now designers can create date difference custom record fields using calculations from today's date
  • Versioning, comparing, and rollback
  • View relationships from the query editor


  • Create rule inputs from the query editor
  • Easy aggregation in the query editor


  • Using a!queryRecordType, designers now have the option to aggregate dates without needing them to group


  • Return total count with batchSize=0
  • Sync data faster

Appian introduced the Explore view in this release. As you build your app, the Explore View presents an overview of its key, high-lever design objects. You can see the below screenshot for your reference.


Now you can navigate to additional app views from the Explore view itself as below screenshot.

In the new release of Appian 22.2, Appian made it easy to keep your data fresh by automatically syncing any data changed by select smart services in the Appian process model. Now, with the Sync Record smart service, you can sync data changed by any system—third-party systems, stored procedures, and any smart service.


Now you can subtract from today's date by using Date Difference functions as Appian introduced in this release. Please click on this link to know more about this function Date Difference


This is all about the new features of the new Appian version, and there are many more but I have explained only a few but important ones. You can see all the new features here Appian Release Notes

If you are new to Appian technology please refer to the link for the exam Associate Developer Exam Certification.

Thank you so much for reading. Please comment about Appian and its new features added if any.

😊 Happy Coding 😊


Friday, April 8, 2022

How to insert multiple records using an editable grid in Appian


Hi, Appian Developers! I hope you all are doing well and safe. Today we are going to learn to insert multiple records for customer in a database table named tbl_customer using an editable grid in Appian. I would clear in the starting, you must be certified with Appian Associate Developer, so it will be easy for you all. First I will tell you the whole requirements and what we are going to implement here.

Requirement:

Let’s consider, that we have a tbl_customer in the Appian cloud database. And this table has the following fields as

·      customerID
·      customerName
·      emailID
·      phoneNumber
·      profilePicture
·      description
·      createdBy
·      createdDate
·      isActive

You can see the below screenshot for how does your table looks like.

Now, we want to insert multiple customer details in one go instead of adding them one by one. It means we will add the multiple customer data from an interface using an editable grid in Appian.

e.g., Customer1, Customer2, Customer3, and Customer4 will have their own CustomerID, CustomerName, emailID, and so on. By implementing this, we are not required to add the n number of customer details one by one. So, without wasting our time, let’s switch to Appian Designer Console. As I am using the free community edition of Appian, I have my own Appian Designer console. You can also request your instance by clicking on this link https://community.appian.com/


I am creating a new application named “Practice for Appian” as below screenshot.

As I have checked the box in yellow highlighted in the above screenshot.

It will create some default folders and groups for me. This feature is available in only Appian version 21.4 release or later. Now click on the save button and you will see your application is created with default objects with folders and groups as below.


First, we will create our Data Store for our application which helps to establish a connection between our database and application. To create the Data Store, please click on the new button and select Data Store as below screenshot.

You must enter your datastore name and description as below.

Now click on Create button and choose your security for datastore object and click on the Save button as below.

Note: Once your CDT is created, do not forget to verify and publish your Data Store.

As we have already created our database table, so now we will create our CDT. To create a CDT, please click on the New button and select Data Type as below screenshot.

We will create our CDT using "Create from a database table or view" and select your Data Source name and table as below.

Now you must enter your CDT name and select your Data Store which we have created as above. Please see the below screenshot for your reference.
Once your CDT is created, now we will create a Constant for our entity as below.
Both Datastore and CDT have been created, now we will create our interface using an editable grid. To create an Interface, please click on the New button and select Interface as below.

Please enter your Interface name below.
Now click on Create button, and you will see the below window.
Now switch to expression mode and paste the below code into your Interface.


Once you pasted the above code, you will see what your interface looks like as below screenshot.

Wow, Congratulations!!! Our interface is ready to insert the multiple customer data into our database table tbl_Customer.

Let's add a few customer details to the form and click on Submit button as below.
Congratulation...!!! 💓💓💓

Successfully, we have inserted our 5 customer details into the database table. As you can see from the below screenshot for our table record.

Note:
I have created two constants, one is to save the customer profile picture, the constant type is a folder, and the second is for CDT, the constant type is the Data Store Entity. And Please add one rule input as items to your interface.

I have used a!writeToDataStoreEntity function on Submit button in the interface to save the customer data into the database table.

Please see my below objects for the application.


I hope, this blog will help you to understand the use of an editable grid within the interface.

Thank you so much for your time.

Please comment if you have any issues regarding the same.

Happy Coding! ✌💓


Tuesday, January 25, 2022

What are the NEW features added in 21.4 Appian Release?

Hello, Appian Developers!

Hope you all are doing well and safe in this pandemic. So, today we are gonna learn about the new release of Appian i.e, 21.4 Appian Release. In this article, we will talk about the new things added to the 21.4 release of Appian. The Appian team is working hard and coming up with the new features, functions etc in its every release.

As far I have gone through the academy videos and community, I found that New features are added from mainly 6 topics which are newly added to the 21.4 Appian release.

  1. Automation
  2. Interface Design
  3. Records
  4. App Deployment and Monitoring
  5. Application Design
  6. Mobile App Development
I have not covered all the topics which are added to the 21.4 Appian Release. I covered the important features which are added to this new release, especially helpful for the freshers to Appian.

Records:

Skip Failed Syncs:

Now Appian introduced a new feature to Records, you can skip failed syncs. It means if your record type got syncs failed, this new feature will skip the failed syncs and it will simply use the data from the last successful sync.
You can turn Off-On skip failed syncs from record type object as below screenshot.


Alerts for Failed Syncs:

Now record type admins and system admins will receive an email if any syncs are failed or skipped without configuring any additional steps. This email alert will explain the details about record type failures and how you can troubleshoot to resolve this issue.


Important Points about Record Type:
  • A single batch can be retried up to 3 times before failing.
  • Up to 10 retries total before the entire sync fails.
  • Enhancements to the record type object.
  • "Search" is now "Search and User Filters" and "Views" is now "Views and Headers".
  • Improved layout for configuring the record views.

Interface:

Appian introduced the new feature in the Interface i.e, Card Choice Component as a virtually engaging alternative to checkboxes and radio buttons.


We can also decorate the bar with cards to attract and enhance the user experience in terms of UI design.


Introduced two new interface patterns Tabs(Cards) and Tabs(Lightweight).


Appian introduced some new functions as below:

  • a!keys()
  • a!isNullOrEmpty()
  • a! isNotNullOrEmpty()
  • a!doesGroupExist()
The main feature which I love the most in the 21.4 Appian release is that now New Application will add the groups and folders automatically. While creating a new application, you can see an option to check if you want the application to create groups and folders automatically.


Once you checked the checkbox, you will see the below popup window that will show how groups and folders will be added automatically.


It will also use them in any new objects you create in the application which started with the application itself.


it specifies the default securities for the new objects.


Appian improved its searching functionality to search the applications faster by using the prefix of the application name.

Powerful New Design Capabilities:

  • Wizards
  • Custom Validations
  • Cascading Dropdowns
  • Conditional Displays
Please like and share if you like the new features of the 21.4 Appian release.

Happy Learning 😊!